How to Prototype Game UI with Unity AI: A Beginner’s Guide
A game interface can look polished and still be difficult to use. The health icon might disappear against the background. The coin counter might overlap a button on a smaller screen. An inventory panel might look convincing but have no working interactions.
AI can help you create the graphics faster. Building a useful interface still requires layout, functionality, and testing.
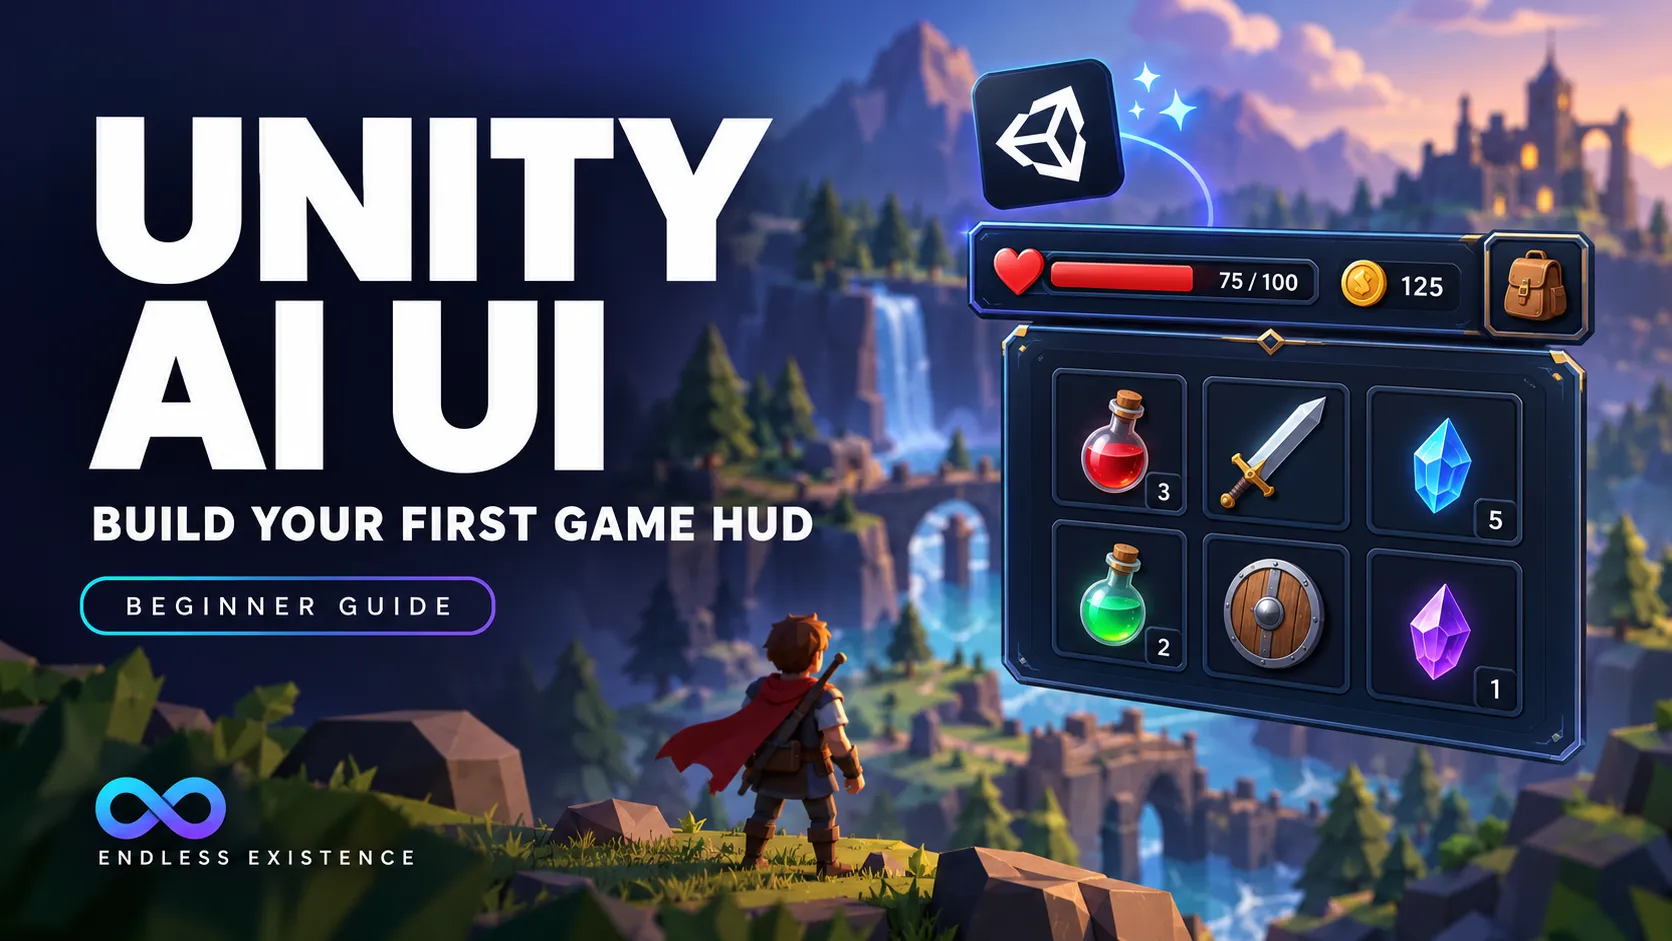
This Unity AI UI tutorial walks through a small heads-up display, or HUD, with a health bar, coin counter, and inventory button. You will start with a working layout, generate a few supporting assets, and connect the interface to a simple demonstration script.
The goal is a prototype you can evaluate during gameplay—not just an attractive screenshot.
What Does Unity’s “AI UI Generator” Actually Mean?
Unity describes its UI Generator as a workflow that combines Sprite Generator, Texture Generator, and AI Assistant. It is not a single tool that automatically produces a complete, functioning interface.
Sprite generation provides assets such as icons and UI graphics. Texture generation supplies images such as backgrounds and panel fills. Assistant can help with the implementation around them. Unity’s official guide discusses using this workflow with both uGUI and UI Toolkit. unity.com
For this tutorial, we will use uGUI: Unity’s GameObject-based UI system built around a Canvas, Images, Buttons, and text elements.
Keeping one UI system throughout the example makes the setup easier to follow.
What We Will Build
Our example is a landscape adventure-game HUD.
| Element | Purpose | AI-generated asset |
|---|---|---|
| Health display | Shows remaining health | Heart icon |
| Coin counter | Shows collected currency | Coin icon |
| Inventory button | Opens and closes a panel | Backpack icon |
| Inventory panel | Holds future item slots | Optional panel background |
The health fill and numerical labels will remain ordinary Unity UI elements.
This matters because game values need to change independently of their artwork. Generating a picture that already contains “100 HP” would make updating, localization, and resizing unnecessarily difficult.
Before You Start
You should be able to:
- Create and save a Unity scene.
- Select GameObjects in the Hierarchy.
- Change component values in the Inspector.
- Create and attach a C# script.
You also need access to the relevant Unity AI tools.
Check the requirements for your installed version. For example, the Assistant 2.11 documentation lists Unity 6000.0.76f1, Unity 6.3, or later, and describes installation through the Editor’s AI menu. That package’s requirements should not be treated as a guarantee for every Unity release or generator configuration. docs.unity3d.com
Follow the current onboarding instructions for accounts, access, and packages. Installing Assistant manually does not by itself guarantee access to every generator.
Create a test scene and a recovery point before experimenting.
Step 1: Decide What the Player Needs to See
Start with information, not decoration.
In our example, the player needs three answers:
- How much health remains?
- How many coins have been collected?
- How can the inventory be opened?
Place health at the upper left, coins nearby, and the inventory button at the upper right. Put the inventory panel in the center when opened.
These are example design choices, not universal rules. A portrait mobile game, racing game, or strategy game may need a different arrangement.
Write a short visual brief before generating anything:
Adventure-game HUD for a landscape prototype.

Style: simple illustrated graphics.
Backgrounds: dark blue.
Accent: warm gold.
Health color: red.
Icons: clear silhouettes with restrained detail.
Labels: separate Unity text elements.

The interface must remain readable over bright
and dark gameplay backgrounds.
Use this brief consistently for every asset.
Step 2: Build the Layout With Placeholders
Create a Canvas through GameObject → UI → Canvas.
For this example, use Screen Space – Overlay so the interface appears over the game view.
Organize the Canvas using the following parent-child relationships:
| Parent | Child objects |
|---|---|
| Canvas | HUD, InventoryPanel |
| HUD | HealthGroup, CoinGroup, InventoryButton |
| HealthGroup | HeartIcon, HealthBarBackground, HealthText |
| HealthBarBackground | HealthBarFill |
| CoinGroup | CoinIcon, CoinText |
| InventoryButton | BackpackIcon |
| InventoryPanel | Title, CloseButton |
Use plain colors initially. Your heart, coin, and backpack can be simple placeholder Images.
Unity UI elements use Rect Transforms, which provide dimensions and layout controls in addition to position, rotation, and scale. Use these to size and position the interface rather than treating every element like a world-space object. docs.unity3d.com
At this stage, check that the interface has enough space for its content. A decorative asset will not fix an overcrowded layout.
Configure the Canvas Scaler
For our landscape prototype, try:
| Setting | Example value |
|---|---|
| UI Scale Mode | Scale With Screen Size |
| Reference Resolution | 1920 × 1080 |
| Screen Match Mode | Match Width Or Height |
| Match | 0.5 |
These values are a starting point. Adjust them for your target screens.
Canvas Scaler can scale the interface relative to a reference resolution. Anchors keep elements positioned relative to their parent, such as a screen corner. Both matter when adapting a layout to different resolutions and aspect ratios. docs.unity3d.com
Set the health group’s anchors and pivot toward the upper left. Set the inventory button’s toward the upper right.
Then check their positions again. Changing anchors can affect the interpretation of existing offsets.
Step 3: Generate Three Simple Icons
Open the Sprite Generator available in your Unity AI installation.
Generate one icon at a time. Separate outputs are easier to inspect and replace than a single image containing the entire HUD.
Heart Icon Prompt
A single red heart icon for an adventure-game HUD.

Simple illustrated style, clear silhouette,
consistent dark outline, restrained shading,
centered composition.

Transparent background, no text, no numbers,
no border, no additional objects.

Must remain recognizable at small display size.
Coin Icon Prompt
A single gold coin icon for an adventure-game HUD.

Match the illustrated style, outline thickness,
and shading of the supplied heart reference.

Simple circular silhouette, restrained detail,
centered composition.

Transparent background, no text, no letters,
no numbers, no additional objects.
Backpack Icon Prompt
A single backpack icon for an adventure-game
inventory button.

Match the supplied UI icon reference:
simple illustrated shapes, consistent dark outline,
restrained shading, warm gold accents.

Centered composition, transparent background,
no text, no border, no additional objects.
If your generator provides reference-image controls, use an approved icon as a style reference for the others.
Prompt wording can request transparency and consistency, but it does not guarantee either. Inspect the actual output.
Evaluate Icons at Their Display Size
A highly detailed icon may look excellent in the generator preview and become unreadable in the HUD.
Compare the candidates inside Unity at the size you intend to use.
Check:
- Can you recognize the object immediately?
- Are the outlines consistent?
- Does the icon remain visible over the game scene?
- Is there unnecessary empty padding?
- Is the background genuinely transparent?
A checkerboard drawn into the image is not transparency. Check the asset over two different solid background colors.
Step 4: Generate an Optional Panel Background
Use the Texture Generator for a subtle inventory-panel image.
A dark blue background for an adventure-game
inventory panel.

Low-detail surface, restrained texture,
quiet center area suitable for readable labels
and item slots.

No text, no symbols, no icons,
no decorative frame, no strong highlights.
The quiet center is deliberate. Players need to see the inventory contents clearly.
You can also keep a solid-color Unity Image. AI generation is useful when it solves a visual need; a plain background may already be the better choice.
Avoid generating a complete panel with baked-in buttons, labels, and item slots. Those elements should remain independently editable and interactive.
Step 5: Import and Assign the Graphics
Save your selected assets in a predictable location, such as:
Assets/UI/Prototype/
Give them descriptive names:
Icon_Heart_PrototypeIcon_Coin_PrototypeIcon_Backpack_PrototypePanel_Inventory_Prototype
For each asset used by a uGUI Image:
- Select the asset in the Project window.
- Check its import settings.
- Set Texture Type to Sprite (2D and UI) if needed.
- Apply the changes.
- Assign the sprite to the appropriate Image’s Source Image field.
An Image expects a Sprite, while a RawImage can display a Texture. Choose the component according to the asset and intended use. docs.unity3d.com
Enable Preserve Aspect where appropriate for icons.
Also check the Image’s Color. A tinted Image changes the appearance of the assigned artwork; use white when you want its original colors.
For purely decorative Images, consider disabling Raycast Target so they do not intercept pointer input unnecessarily.
Configure the Health Fill
Select HealthBarFill and configure:
- Image Type: Filled.
- Fill Method: Horizontal.
- Fill Origin: Left.
- Fill Amount: 1.
Give it a simple, solid sprite. Leave the background visible behind it.
Keep a separate text label such as 100 / 100. The number makes the display useful even when a player cannot easily distinguish the health colors.
Step 6: Add a Small HUD Demonstration Script
Artwork alone does not make the HUD respond.
The following script provides demonstration health and coin values, along with an inventory toggle. It is a test harness for this tutorial, not a replacement for your game’s player, economy, or inventory systems.
Create PrototypeHudDemo.cs:
using TMPro;
using UnityEngine;
using UnityEngine.UI;

public class PrototypeHudDemo : MonoBehaviour
{
    [SerializeField] private Image healthFill;
    [SerializeField] private TMP_Text healthText;
    [SerializeField] private TMP_Text coinText;
    [SerializeField] private GameObject inventoryPanel;

    private const int MaxHealth = 100;

    private int currentHealth = MaxHealth;
    private int coins;
    private bool ready;

    private void Awake()
    {
        ready = healthFill != null
            && healthText != null
            && coinText != null
            && inventoryPanel != null;

        if (!ready)
        {
            Debug.LogError(
                "Assign every PrototypeHudDemo reference.",
                this
            );

            return;
        }

        inventoryPanel.SetActive(false);
        RefreshDisplay();
    }

    public void TakeTestDamage()
    {
        if (!ready)
            return;

        currentHealth = Mathf.Max(0, currentHealth - 25);
        RefreshDisplay();
    }

    public void AddTestCoin()
    {
        if (!ready)
            return;

        coins++;
        RefreshDisplay();
    }

    public void ToggleInventory()
    {
        if (!ready)
            return;

        inventoryPanel.SetActive(
            !inventoryPanel.activeSelf
        );
    }

    private void RefreshDisplay()
    {
        healthFill.fillAmount =
            (float)currentHealth / MaxHealth;

        healthText.text =
            $"{currentHealth} / {MaxHealth}";

        coinText.text = coins.ToString();
    }
}
Attach it to an empty GameObject named HUDDemoController. Keep that controller outside InventoryPanel, because the panel starts inactive.
Assign all four Inspector references. Create the numerical labels as TextMeshPro UI text, and import TMP essentials if Unity prompts you.
This example has not been executed in a Unity project here. Compile and verify it in your installed version.
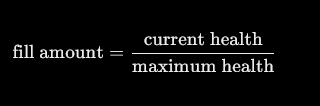
Why Cast Health to a Float?
The health bar expects a fraction:
At 75 health:
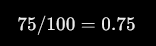
The (float) cast makes this floating-point division. Without it, dividing two integers would truncate the fraction.
Step 7: Connect the Buttons
Select InventoryButton and find its Button component’s On Click list.
- Add an entry.
- Drag
HUDDemoControllerinto the object field. - Select
PrototypeHudDemo → ToggleInventory().
Repeat this for CloseButton.
For testing, add two temporary Buttons:
| Button | On Click method |
|---|---|
| Damage Test | TakeTestDamage() |
| Coin Test | AddTestCoin() |
Unity Buttons expose an On Click event for connecting actions and provide settings for interaction, visual transitions, and navigation. docs.unity3d.com
Ensure the scene has an EventSystem with an input module compatible with your project’s input configuration. The Canvas also needs its Graphic Raycaster for pointer interaction.
Now enter Play Mode and test the controls.
Opening this inventory panel does not pause gameplay. Pausing is a separate feature that would need its own implementation.
Step 8: Use AI Assistant for a Focused Review
Once the structure exists, Assistant can help review a specific problem.
For example:
Review this uGUI HUD setup.

Check the health Image configuration, assigned
PrototypeHudDemo references, and inventory Button
events using the project information available to you.

Do not change anything yet.

Report inspected facts separately from assumptions.
Explain any manual checks I still need to perform.
For code assistance, specify your existing system:
Help connect this HUD to my existing player health
component.

Inspect its public interface first.
Do not create another health system.

Propose how the HUD should receive updates,
and list the files that would change.
This avoids a common integration mistake: generating another source of health values instead of displaying the game’s existing state.
If you want to use an external agent for Editor inspection, the related Unity MCP guide explains that connection workflow. Publish the linked article before using this internal link.
Step 9: Test Readability, Layout, and Behavior
Test three things separately.
Does the Information Update Correctly?
For the demonstration script:
- Health starts at
100 / 100. - Each damage click subtracts 25.
- Health stops at zero.
- The fill reaches empty at zero.
- Each coin click adds one.
- The inventory opens and closes repeatedly.
Does the Layout Adapt?
Try multiple Game view resolutions and aspect ratios.
Check for clipped text, overlapping controls, stretched icons, and excessive scaling.
A 1920 × 1080 reference resolution does not automatically make the HUD suitable for portrait screens. Mobile support also requires checking safe areas and actual device usability.
Is It Readable During Gameplay?
Test over bright, dark, and visually busy backgrounds.
Also try longer values. A coin display that fits 9 may fail when it reaches 99999.
For an interactive panel, check mouse or touch input and any keyboard or controller navigation your game supports.
Common Problems and Fixes
| Problem | Likely check |
|---|---|
| Icon appears stretched | Rect Transform proportions and Preserve Aspect |
| Icon has an unwanted background | Actual alpha transparency in the generated asset |
| Health bar stays full | Image Type, Fill Method, script reference, and current value |
| Button does nothing | On Click assignment, EventSystem, input module, and Console |
| Button cannot be clicked | Interactable setting and overlapping raycast targets |
| UI shifts on another screen size | Anchors, pivots, offsets, and Canvas Scaler |
| Artwork looks blurry | Source resolution and texture import settings |
| Text blends into the panel | Background detail, text contrast, and text size |
Fix the underlying setting before generating replacement artwork. Many apparent art problems are layout or import problems.
Moving From Prototype to a Maintainable UI
Once the prototype is useful, replace the demonstration state with real game data.
The HUD should display health and coins owned by the relevant gameplay systems. It should not silently maintain competing values.
Also review:
- Consistency across all UI assets.
- Asset sizes and target-platform import settings.
- Button feedback and navigation.
- Localization space.
- Accessibility and information beyond color.
- Rights and applicable distribution requirements for generated assets.
Unity’s guide describes AI-generated asset metadata and notes that developers remain responsible for checking usage rights and relevant storefront declarations. Check the current requirements for your intended release platform. unity.com
Keep prototype assets clearly named so replacing them later does not become a project-wide search.
Frequently Asked Questions
Can Unity AI Generate a Complete Working HUD?
It can assist with graphics and implementation tasks. You still need to verify layout, references, behavior, input, and integration with your game.
Should I Generate Text as Part of an Image?
Usually, keep labels and changing values in Unity text components. They are easier to update, resize, translate, and style.
Do I Need AI-Generated Backgrounds?
No. Solid-color panels are often clearer and easier to maintain. Generate artwork where it improves the prototype.
Can I Follow This Tutorial With UI Toolkit?
The overall workflow transfers, but this example’s GameObjects, Image components, Button events, and C# references are specific to uGUI. A UI Toolkit implementation needs different setup and code.
Build a HUD You Can Actually Evaluate
Start with a readable layout and working values. Then add a small, consistent set of generated graphics.
That order lets you judge whether the artwork improves the interface while keeping the important parts—health, currency, and interaction—easy to test.
A useful prototype helps you make decisions about your game. Its value comes from what you can learn by playing with it.